In this demo, you will learn how to create a transit gateway and transit gateway attachment for 3 VPCs in the same region. We will connect the 2 private instances inside the public instance using the transit gateway
A transit gateway is a network transit hub that you can use to interconnect your virtual private clouds (VPCs) and on-premises networks. As your cloud infrastructure expands globally, inter-Region peering connects transit gateways together using the AWS Global Infrastructure.
Before creating the transit gateway we need 3 EC2 instances in 3 VPC. One instance is public and the other 2 are private.
To create an EC2 instance inside a custom VPC refer to my previous blog about 👉Creating an EC2 Instance using Custom VPC👈
Let’s begin😎
Task 1️⃣
Create 3 VPCs in the same region
VPC A — 10.10.0.0/16 & 10.10.1.0/24 (public subnet) attach IGW (Internet gateway)
VPC B — 10.20.0.0/16 & 10.20.1.0/24 (private subnet) don’t attach IGW
VPC C -10.30.0.0/16 & 10.30.1.0/24 (private subnet) don’t attach IGW


Once you create VPC and subnets it should look like this👆.
Now let’s move to the next task
Task 2️⃣
Create an ec2 instance in each VPC
VPC A instance under security group add the inbound rule as SSH and All traffic 10.0.0.0/8
VPC B and VPC C instance security groups add the inbound rule as All traffic 10.0.0.0/8
10.0.0.0/8 = This will help the instance to connect with all /16 CIDR VPCs

Now we have 1 public instance and 2 private instances
Connect the public instance and try to ping the private instance inside the public instance
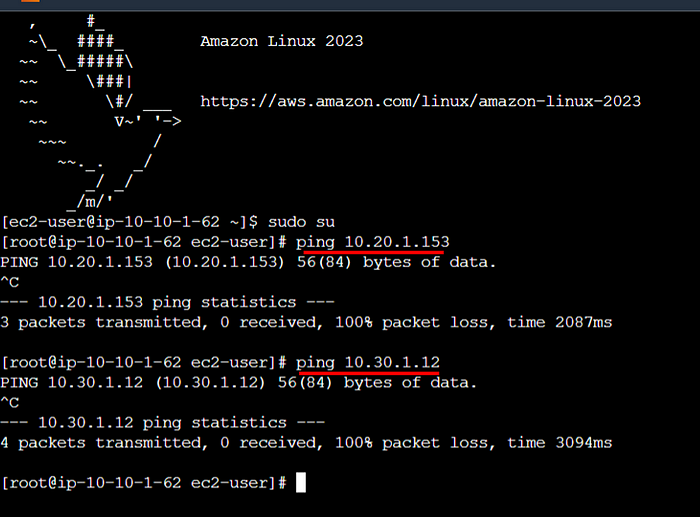
As we see above that we are not able to connect.
To resolve this issue we need to create a Transit gateway and Transit gateway attachment then add the Transit gateway attachment to each subnet.
And you wondering how to do all these. Don’t worry😊 I’ll show you everything in detail. Follow the below steps;
Task 3️⃣
Create Transit Gateway
Go to AWS management console → VPC → Transit gateways → create transit gateway

- Give a name and leave everything default then click on create transit gateway
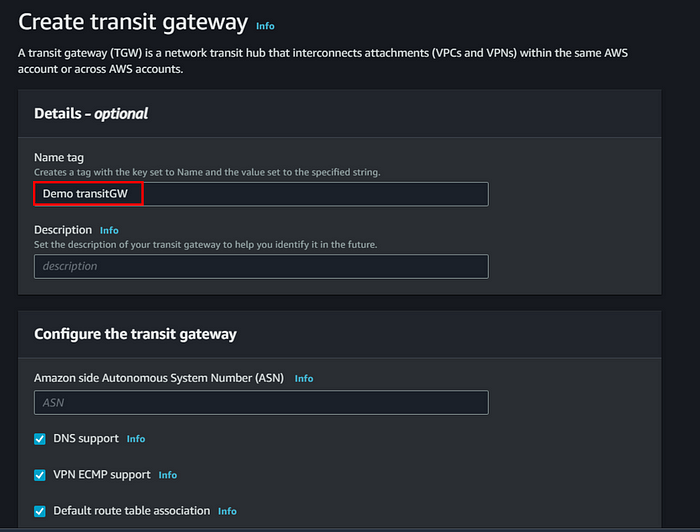
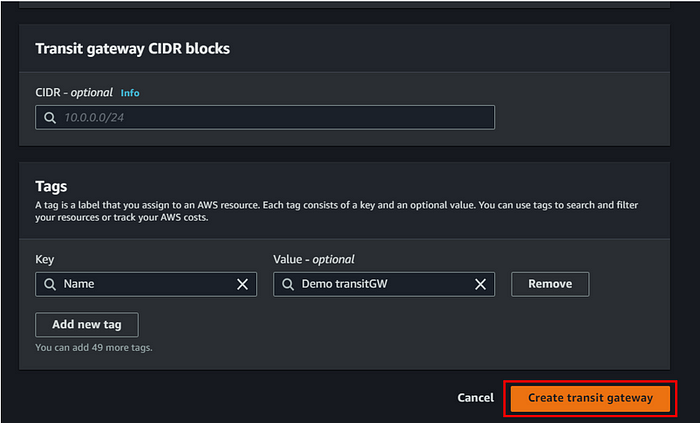

A transit gateway has been created
Next, we need to create a Transit Gateway attachment for each VPC we created.
- To create a transit gateway attachment follow the below steps;
Go to VPC under transit gateway we can see the transit gateway attachment. Click on create transit gateway attachment

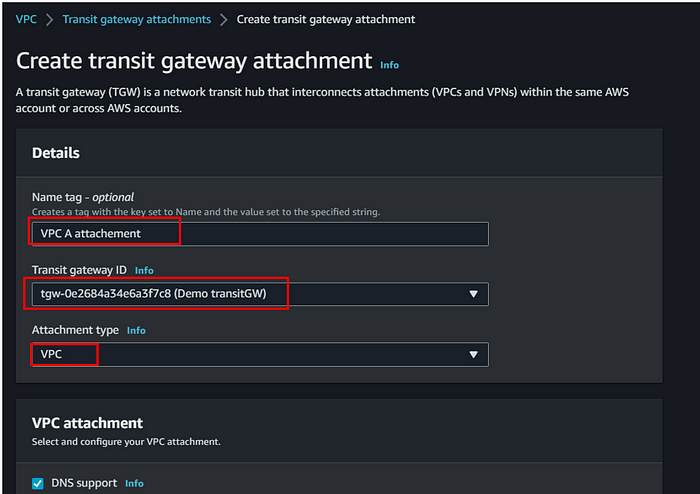
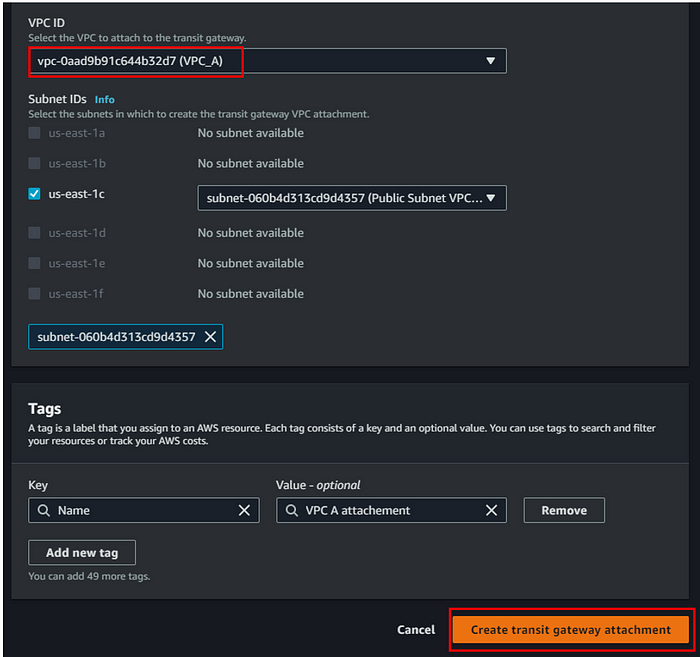
Transit gateway attachement for VPC A
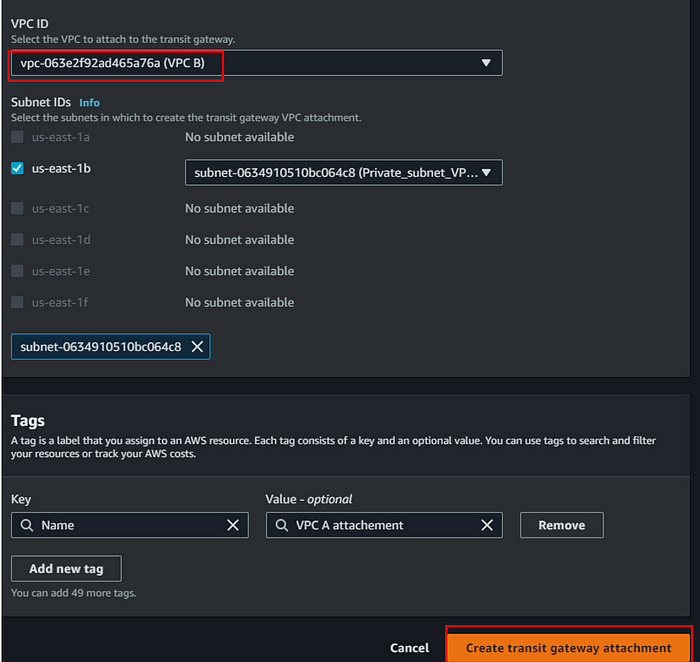
Transit gateway attachment for VPC B
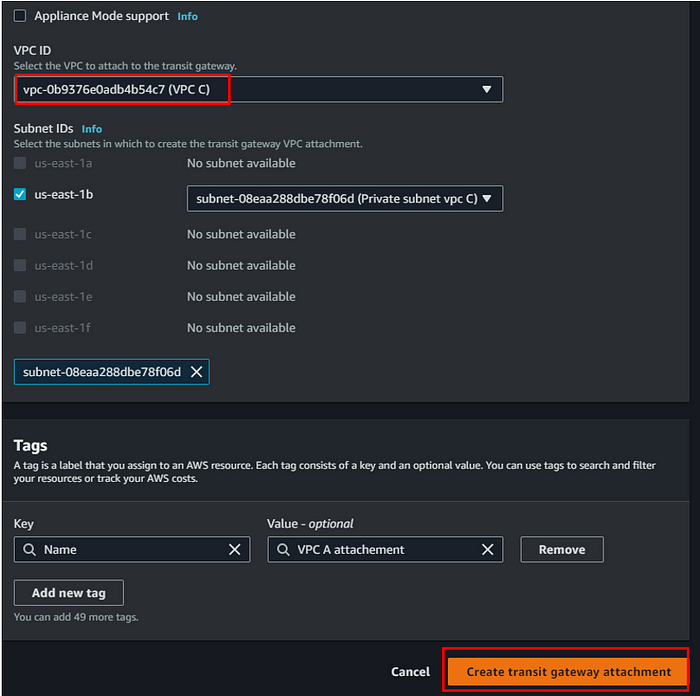
Transit gateway attachment for VPC C

Now we have 3 transit attachments for 3 VPCs
What do you think now if we go back to our instance and try to connect then will it get connect ?🤔
❌ No!
To connect we need to add this transit gateway attachment to each route table we created for each subnet.
To do that follow the below steps;👇
Go to route table → select each route table → click on edit routes → click on add routes → select transit gateway attachment we created → Save
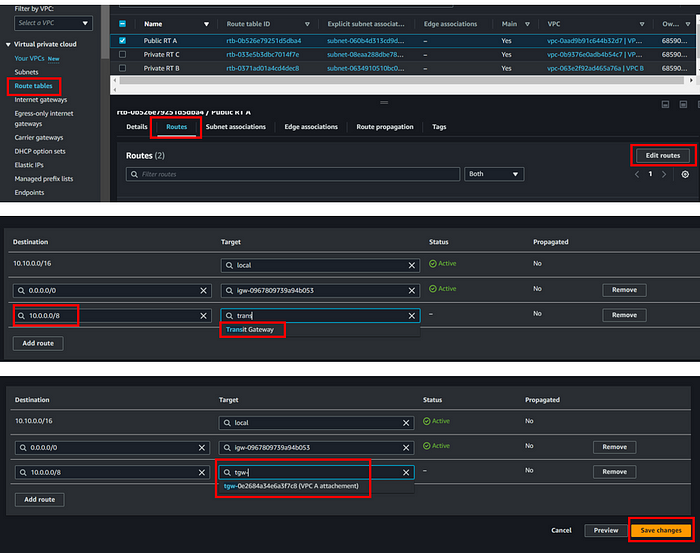
📌Do the same for other route tables as well
Once you are done with that each route table should look like this👇

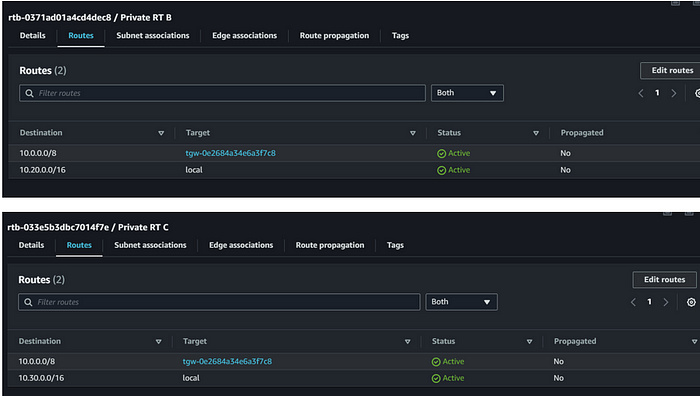
👏 We have done with all the configuration.
Now if we go to the instance and try ping we should be able to see it’s working
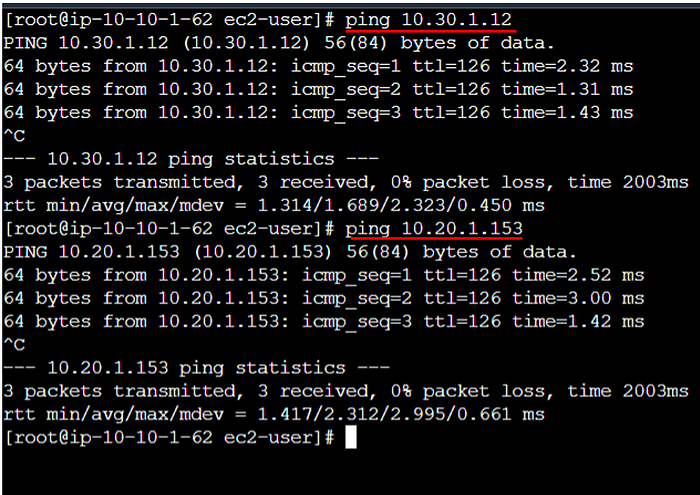
The transit gateway will be useful when we want to connect multiple VPCs. Instead of VPC peering we can go for transit gateways
With this, any VPC can connect to other VPCs which have the transit gateway rule attached
Task 4️⃣
🧹 Clean UP
- Delete transit gateway attachments

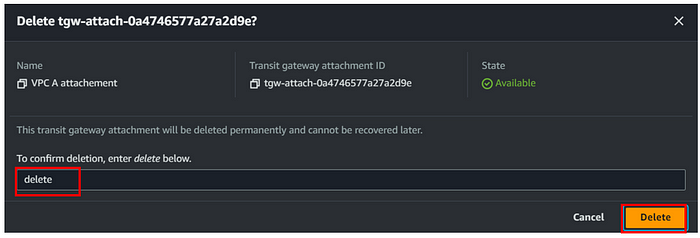
📌 delete all three attachments like this
- Delete transit gateway
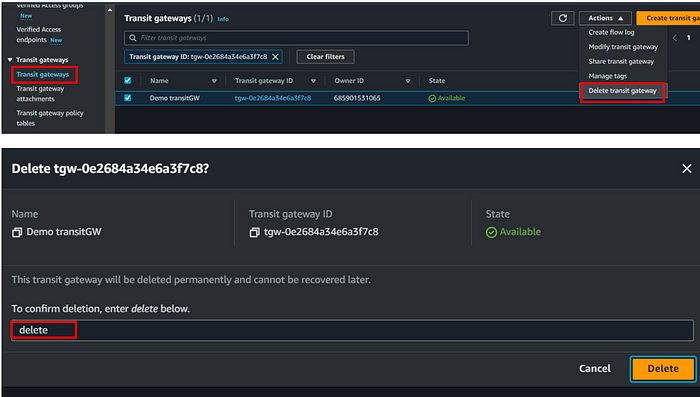
- Terminate the instances we created for this demo

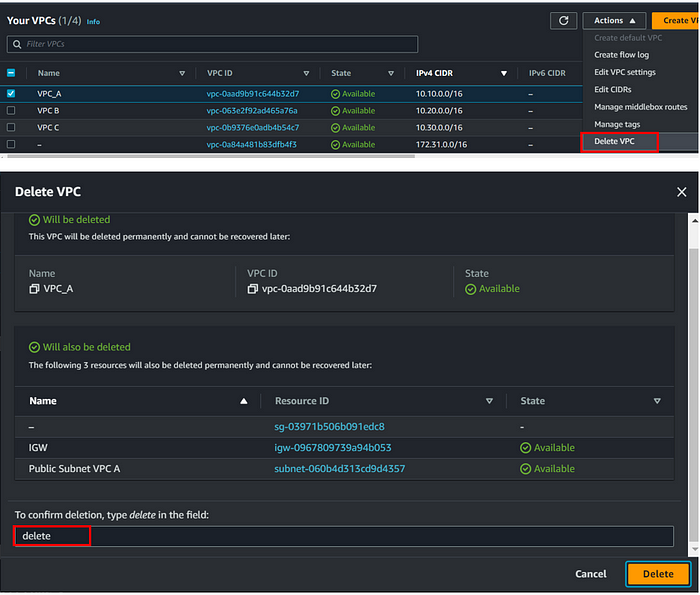
Delete VPCs (all three we created for this demo)
Select each VPC individually and delete
